Learn how to activate and configure the information that should be included in the register closing report generated by Nex.
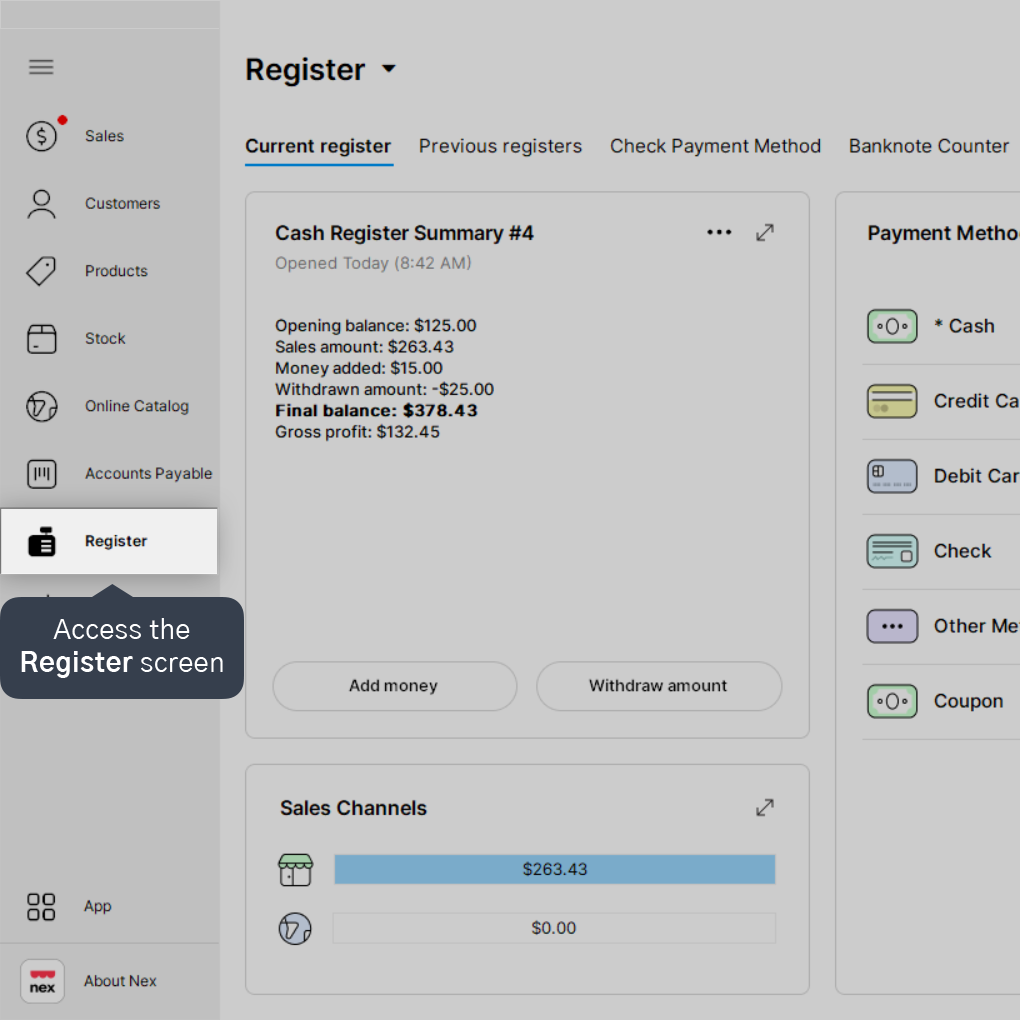
1. Access the Register screen.
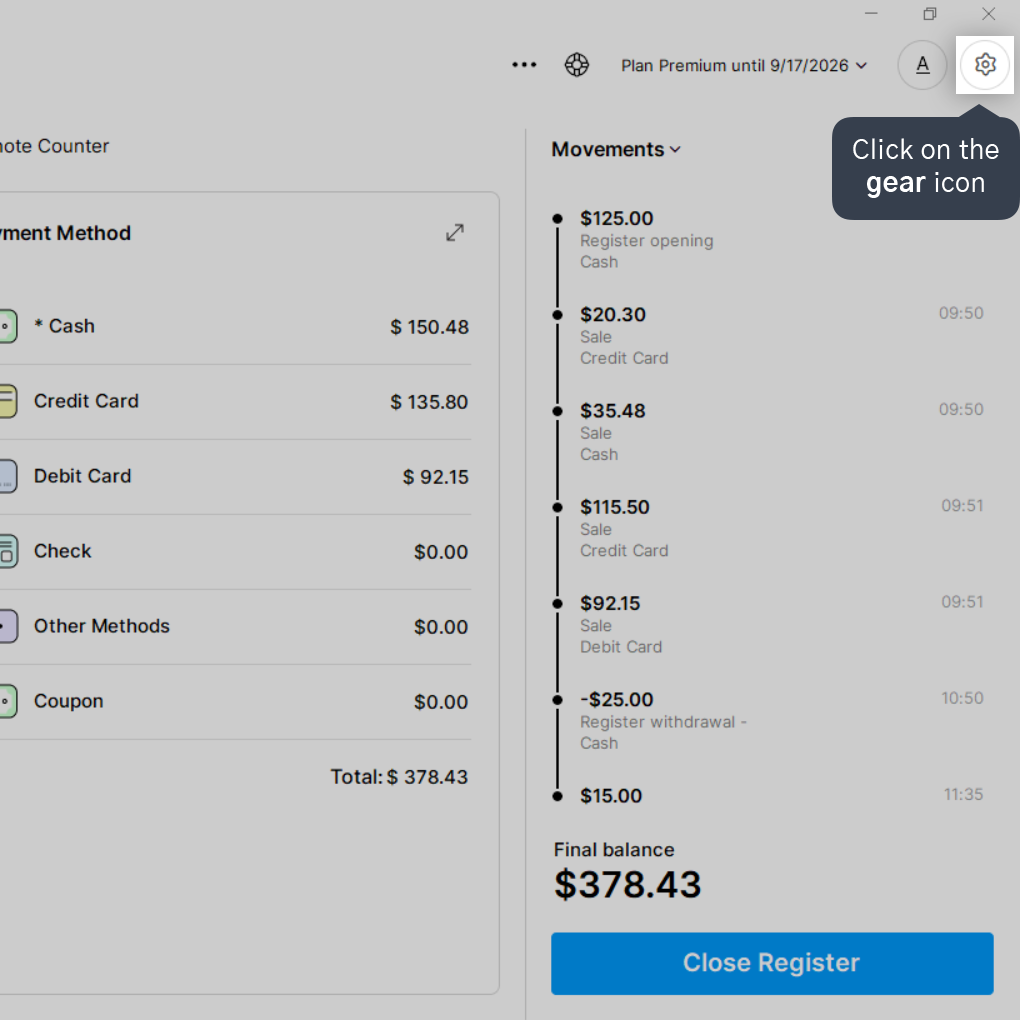
2. Click on the gear icon in the upper right corner.
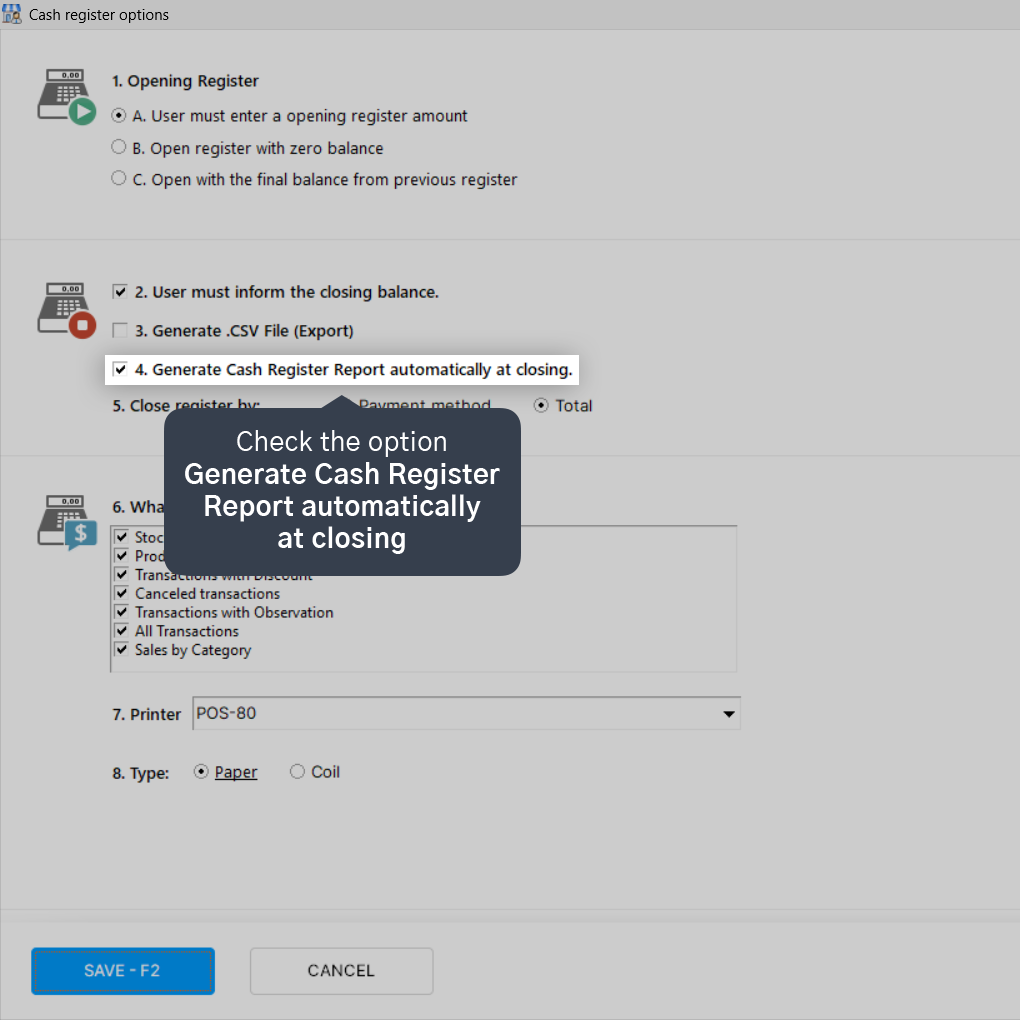
3. Check the option Generate Cash Register Report automatically at closing.
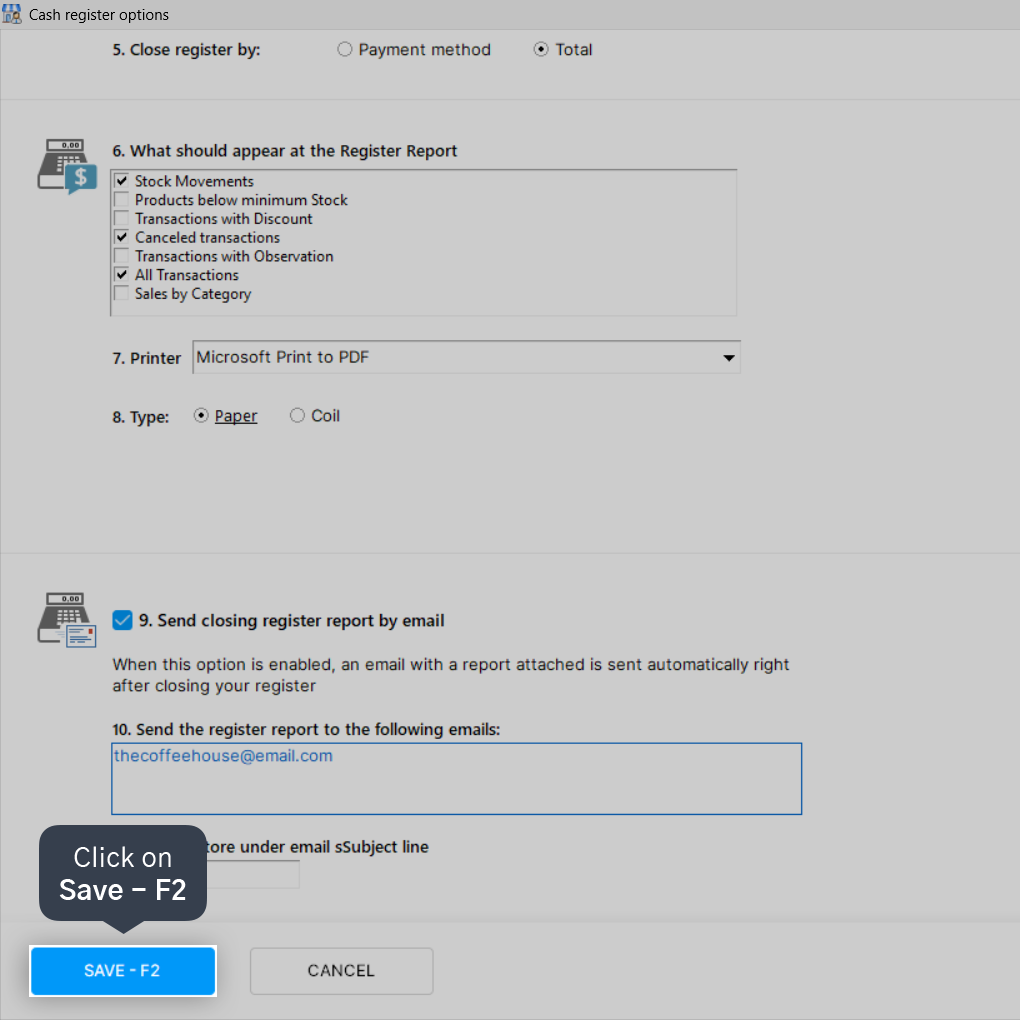
4. In the option What should appear at the Register Report, check the information that should appear in the report.
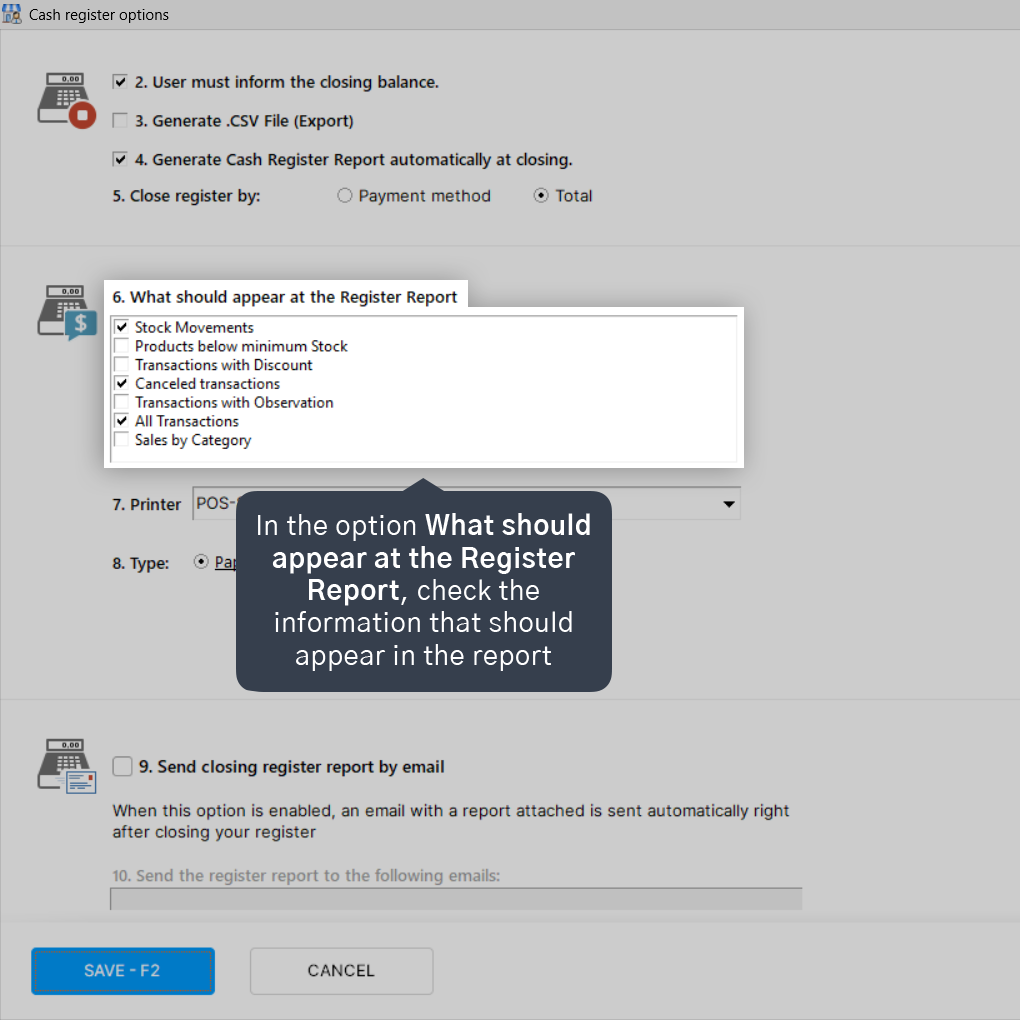
If you do not check any of the available information, the report will be generated with basic closing details.
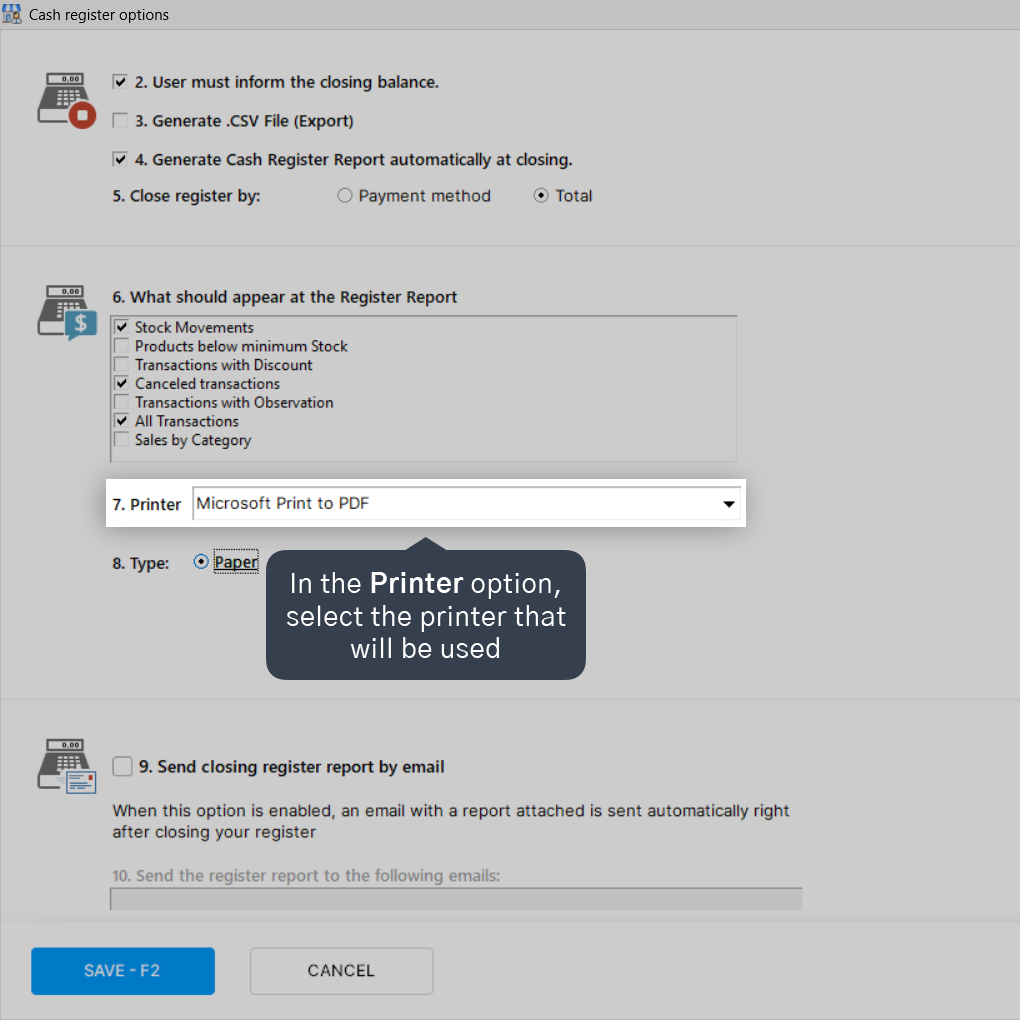
5. In the Printer option, select the printer that will be used.
6. Select the desired Type, between Paper or Coil.
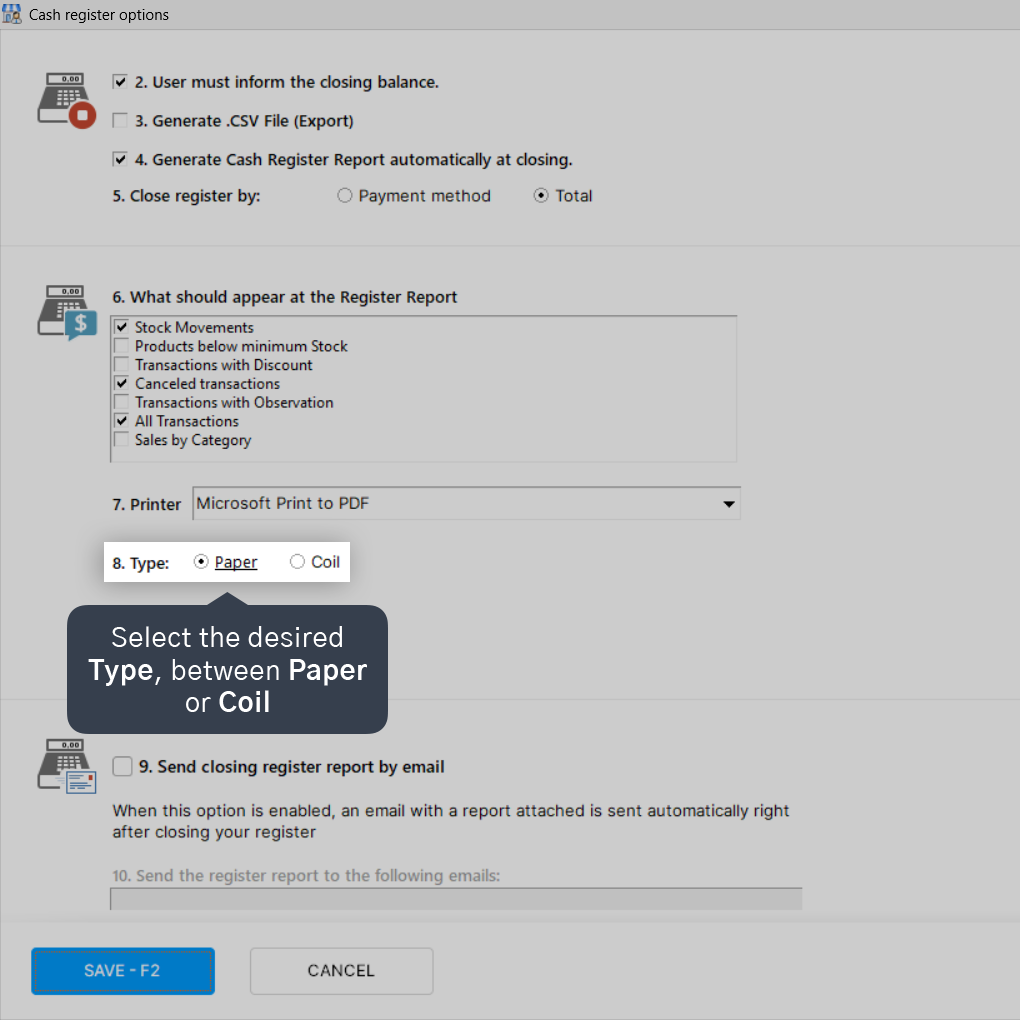
If you use a coil printer(roll-type), enter the font size that will be used - the default size is 12.
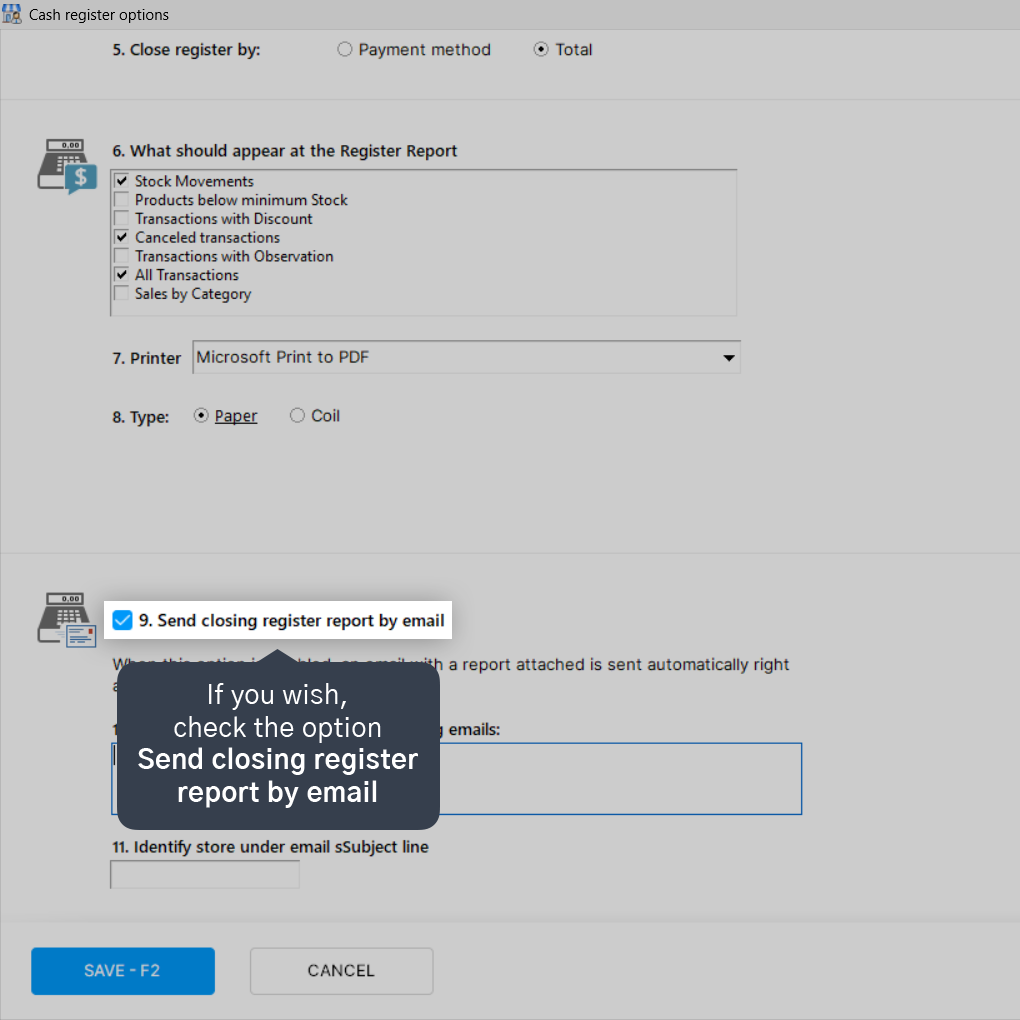
7. If you wish, check the option Send closing register report by email.
8. If you check the previous option, enter the email to receive the report in the field Send the register report to the following emails.
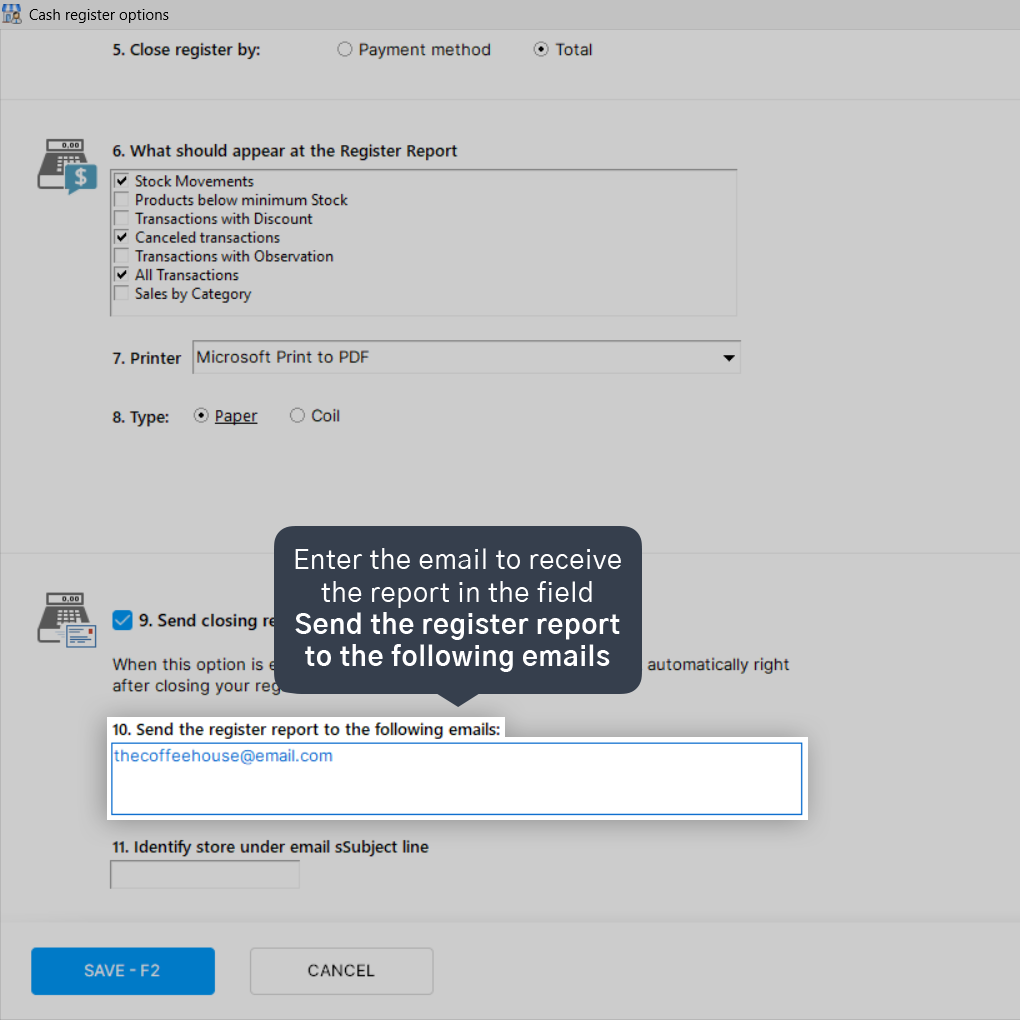
If you wish to configure sending to more than one email address, enter one email per line.
9. If necessary, fill out the Identify store under email subject line.

This procedure is interesting if you have more than one store sending cash register closing reports to a single email address.
10. After finishing the configurations, click on Save - F2.
Done! Now, when you close a register, a register closing report will be automatically generated.


