Some scales print barcode labels. To scan and read these labels in Nex, you need to configure a setting in your system. Learn how in this tutorial.
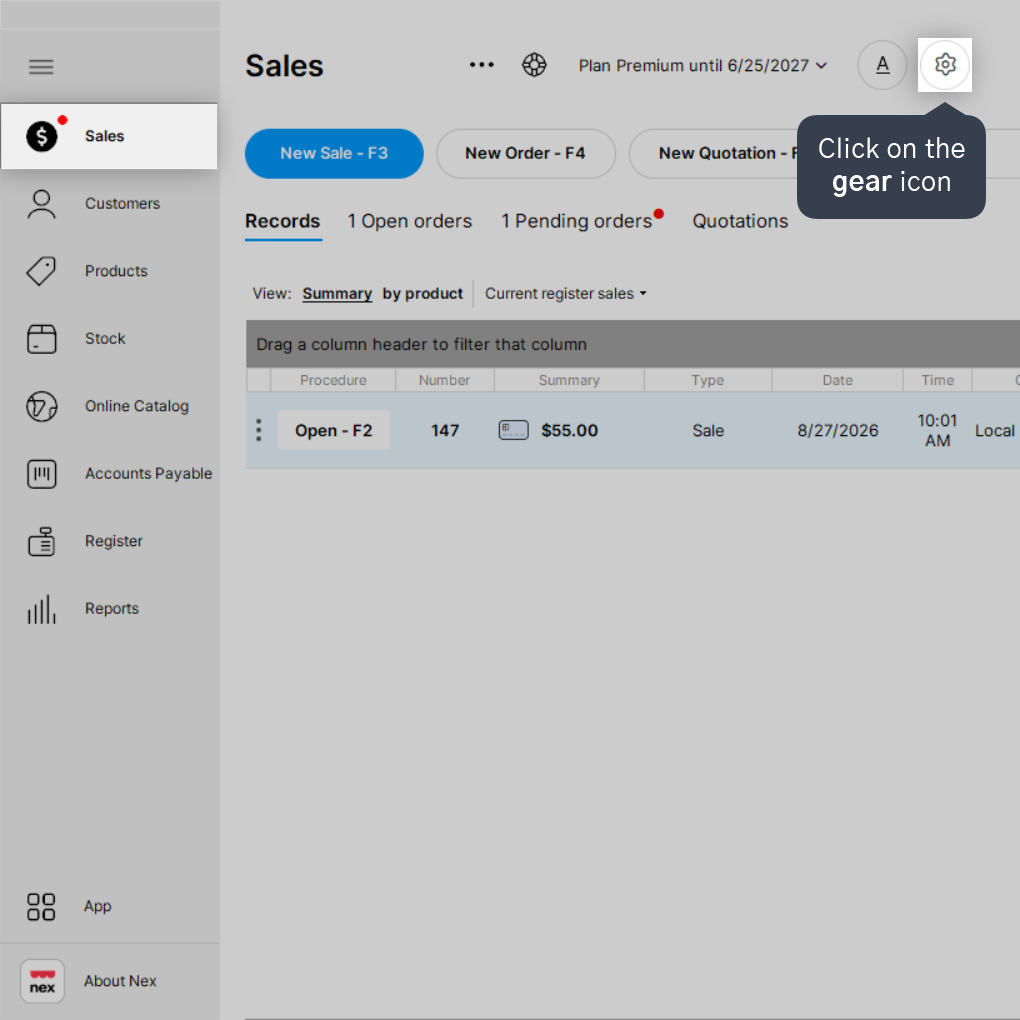
1. On the Sales screen, click on the gear icon in the top-right corner.
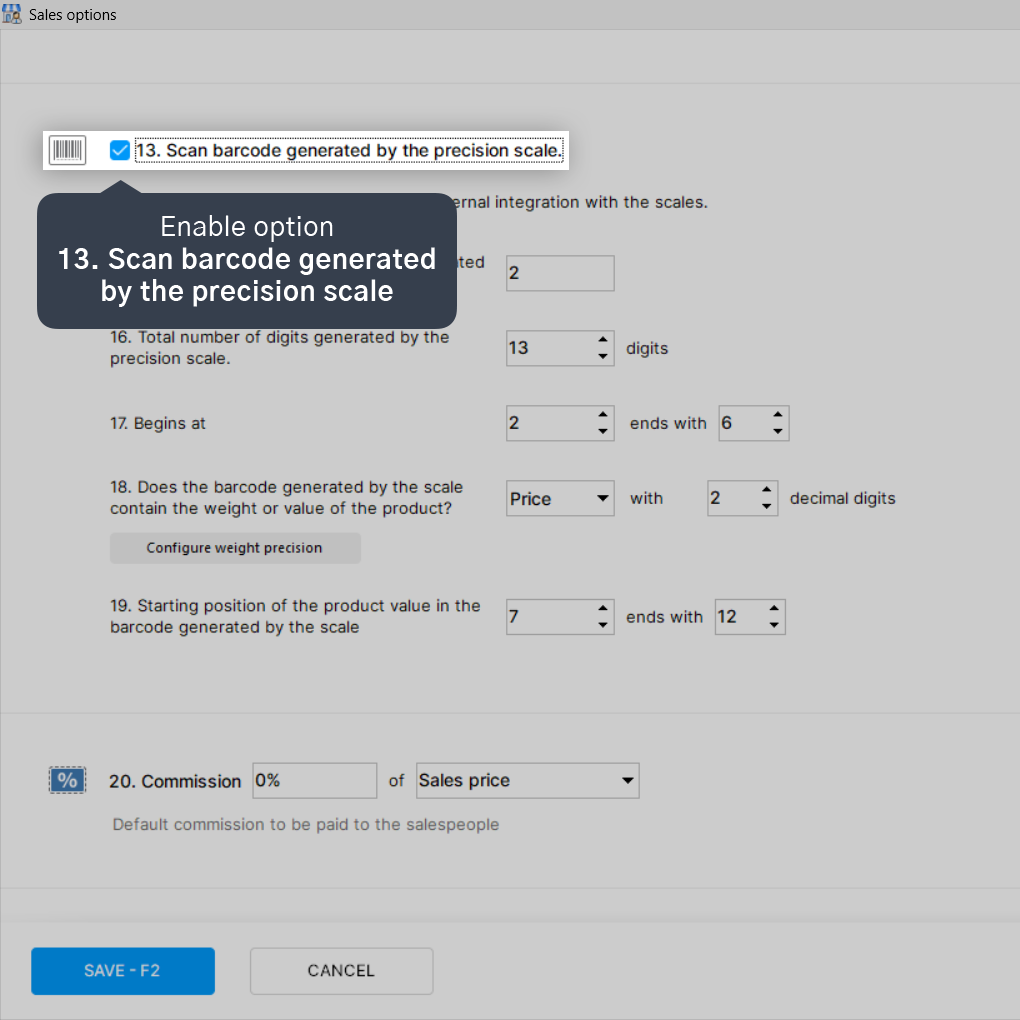
2. Enable option 13. Scan barcode generated by the precision scale.
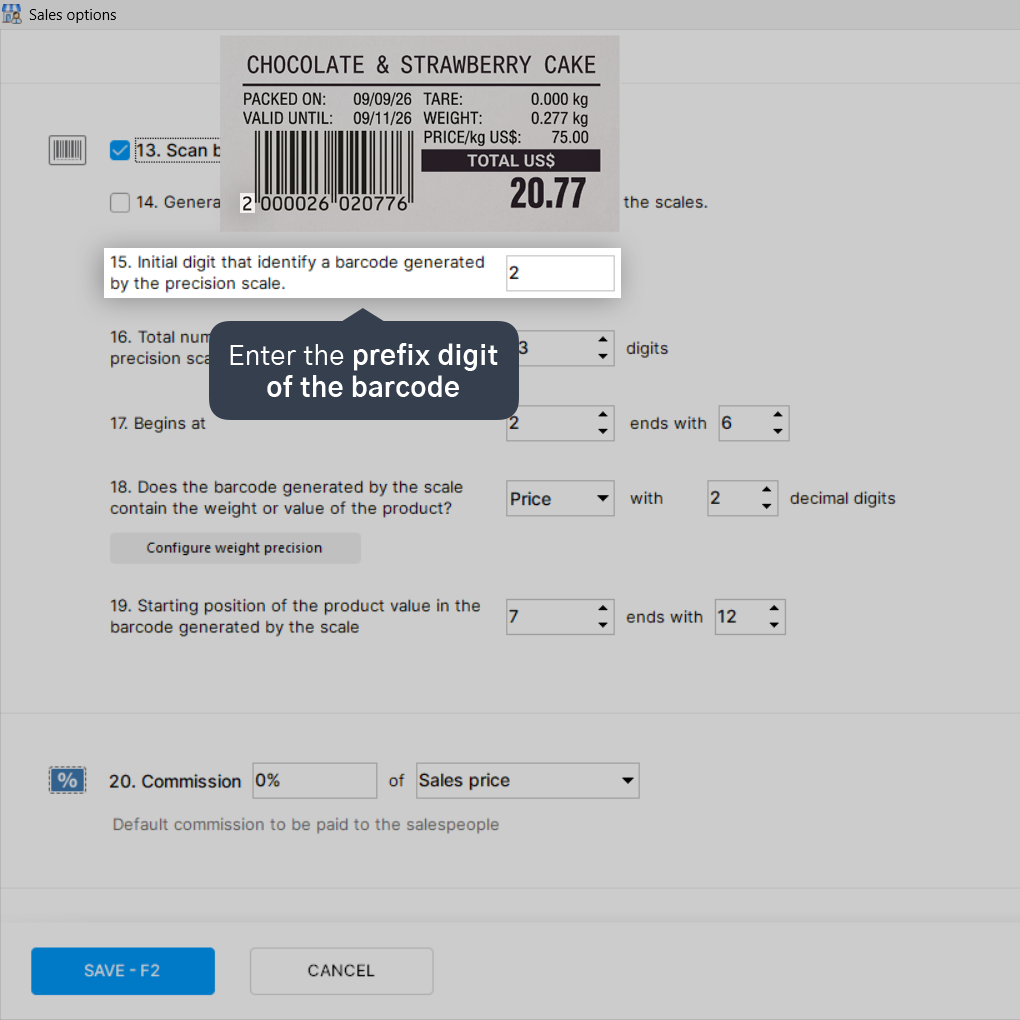
3.In the Initial digit option, enter the prefix digit of the barcode generated by your scale.
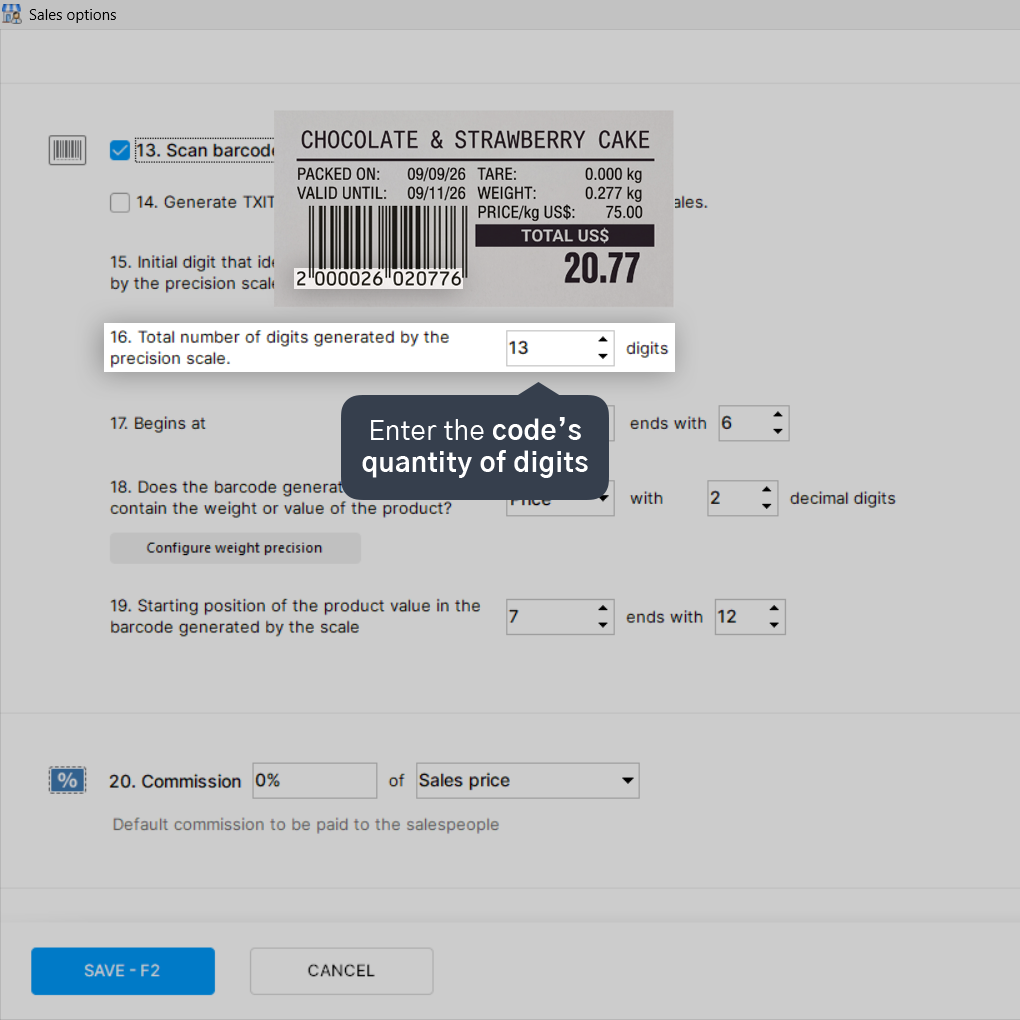
4. In the Total number of digits option, enter the total count of digits in the barcode generated by the scale.
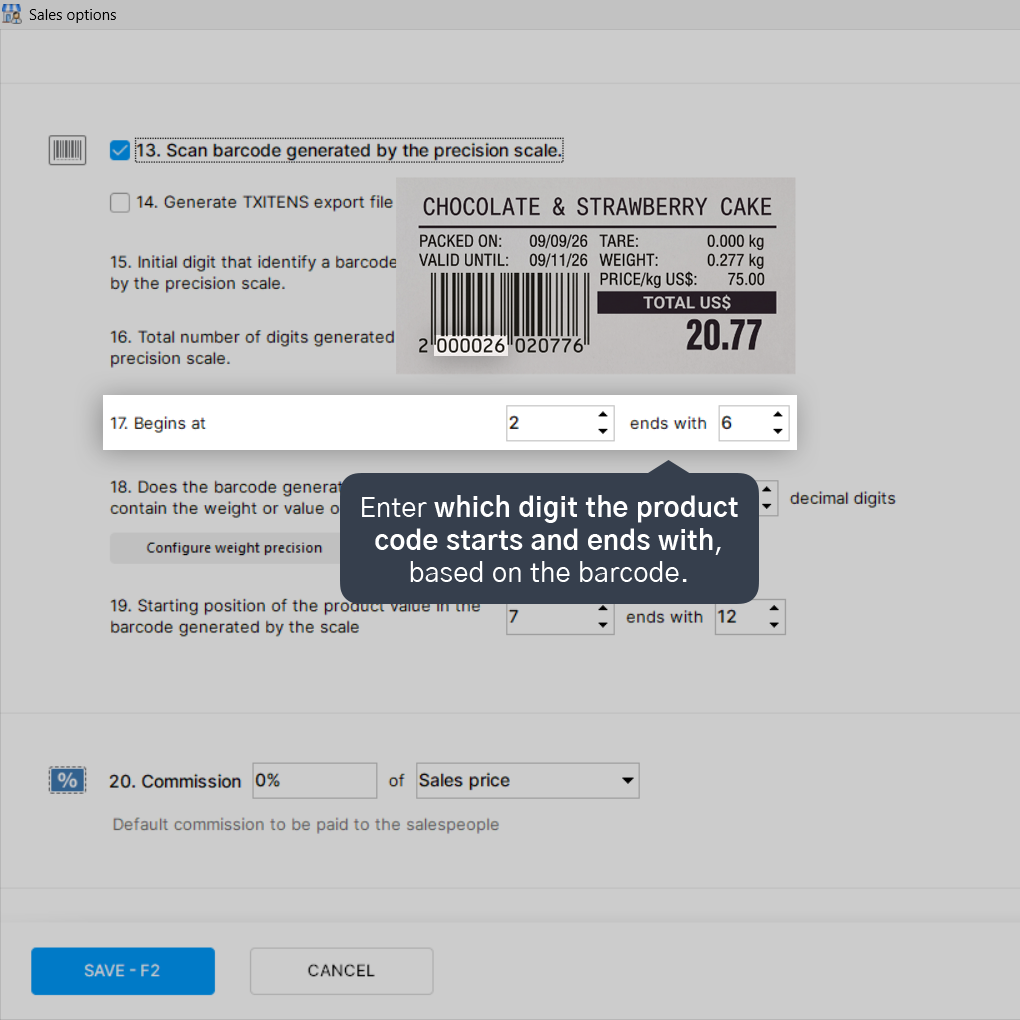
5. In the Begins at and ends with options, enter the starting digit position and ending digit position that identify the product code within the barcode.
6. In options 18 and 19, configure which barcode digits represent the product's weight or price information. Specify the starting digit and ending digit for this data. You also need to select whether the scale-generated barcode contains weight or total price, as well as the number of decimal places used by the scale.
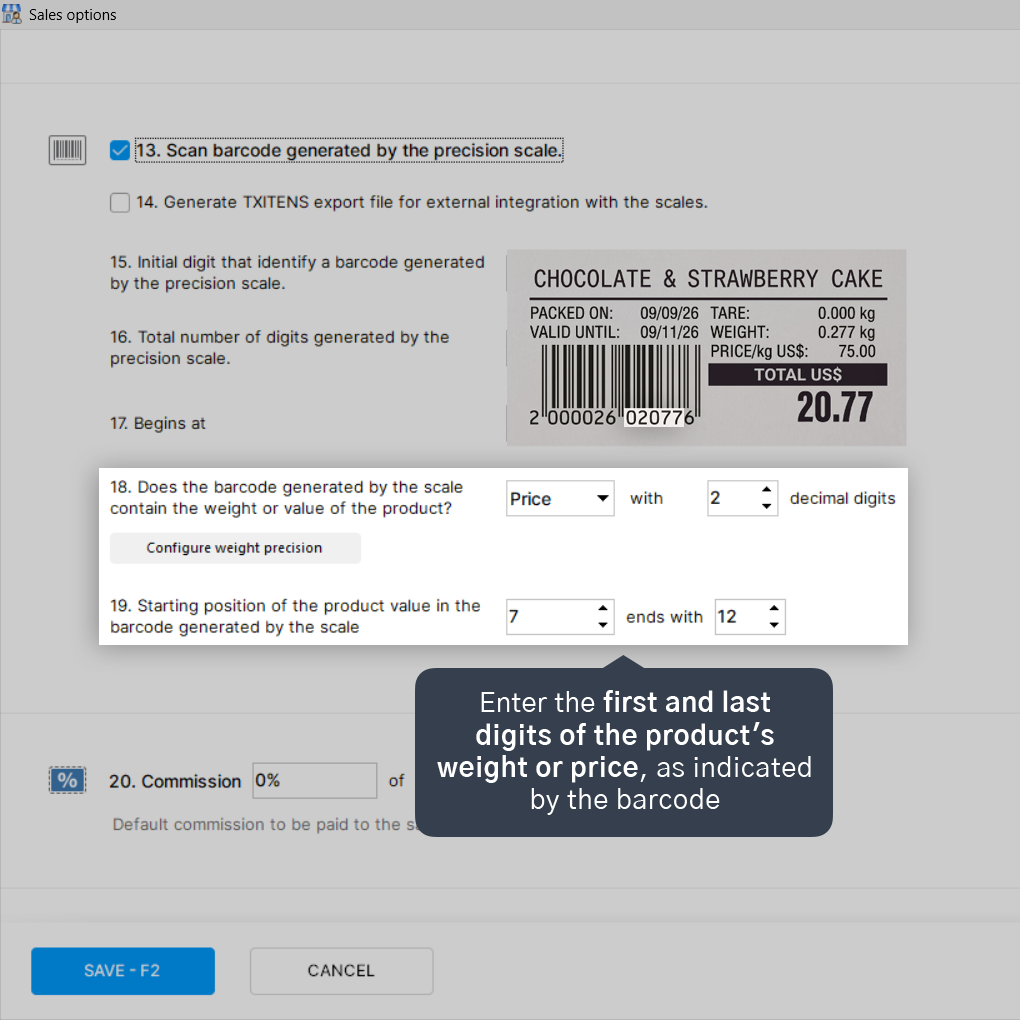
To make it easier: these are usually the remaining digits on the label, excluding the final checksum digit of the barcode.
7. Click on Save - F2.
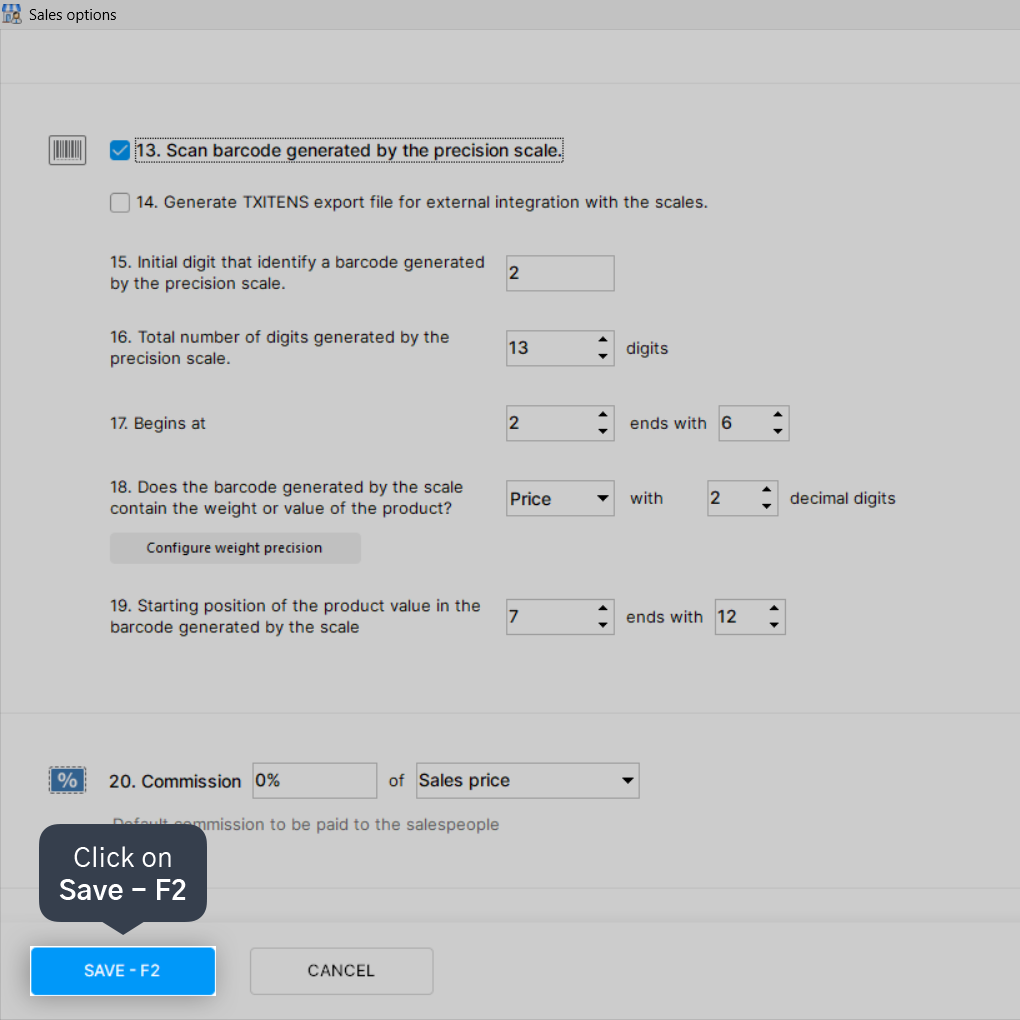
Done! Configuration successfully completed.


