See how to use Nex to manage your customers' consumption by registering tables.
Here you will learn how to manage tables through the software, registering tables as customers and leaving sales as a debt until the customer finishes consumption and makes the payment.
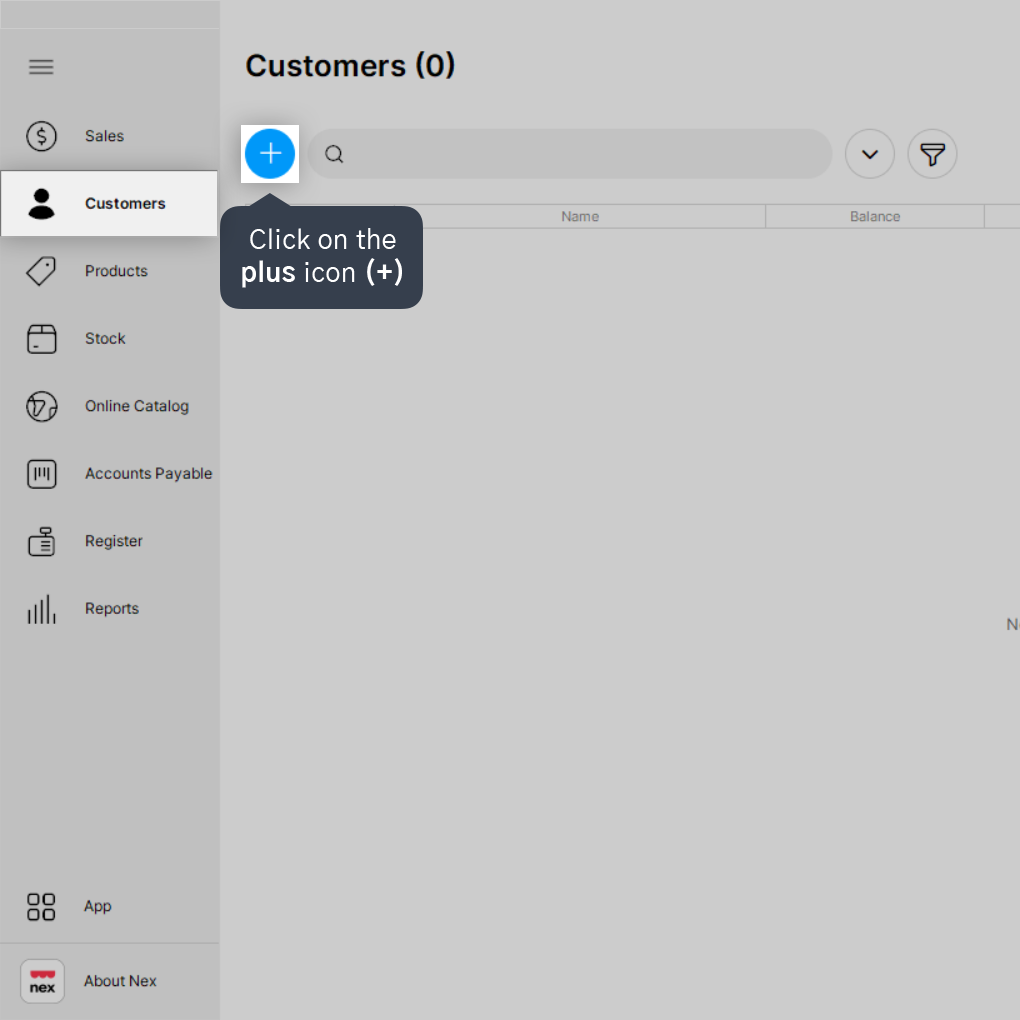
1.1. Access the Customers screen and then click on the plus icon (+) to register a new customer.
1.2. Fill in the Name field with the table number and then click on Save - F2.
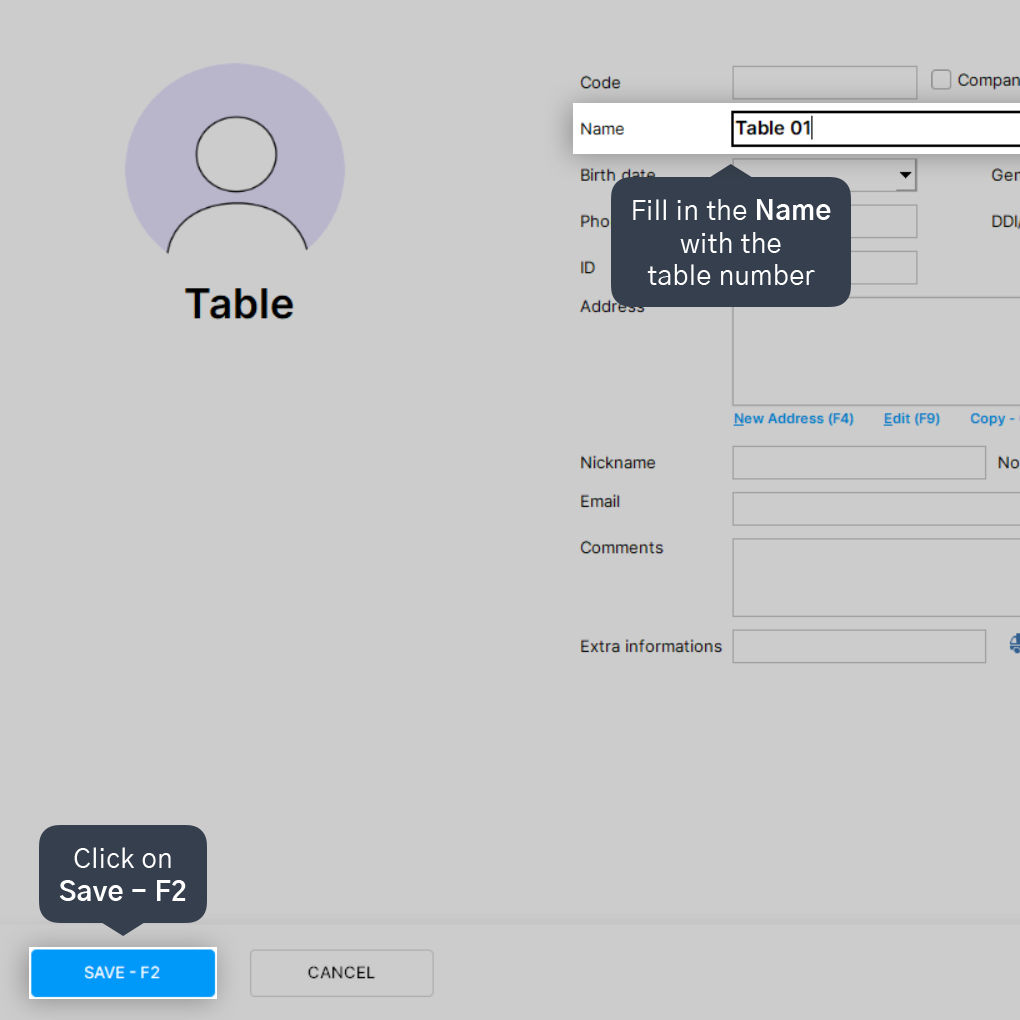
You must follow this same procedure to register the total number of tables needed.
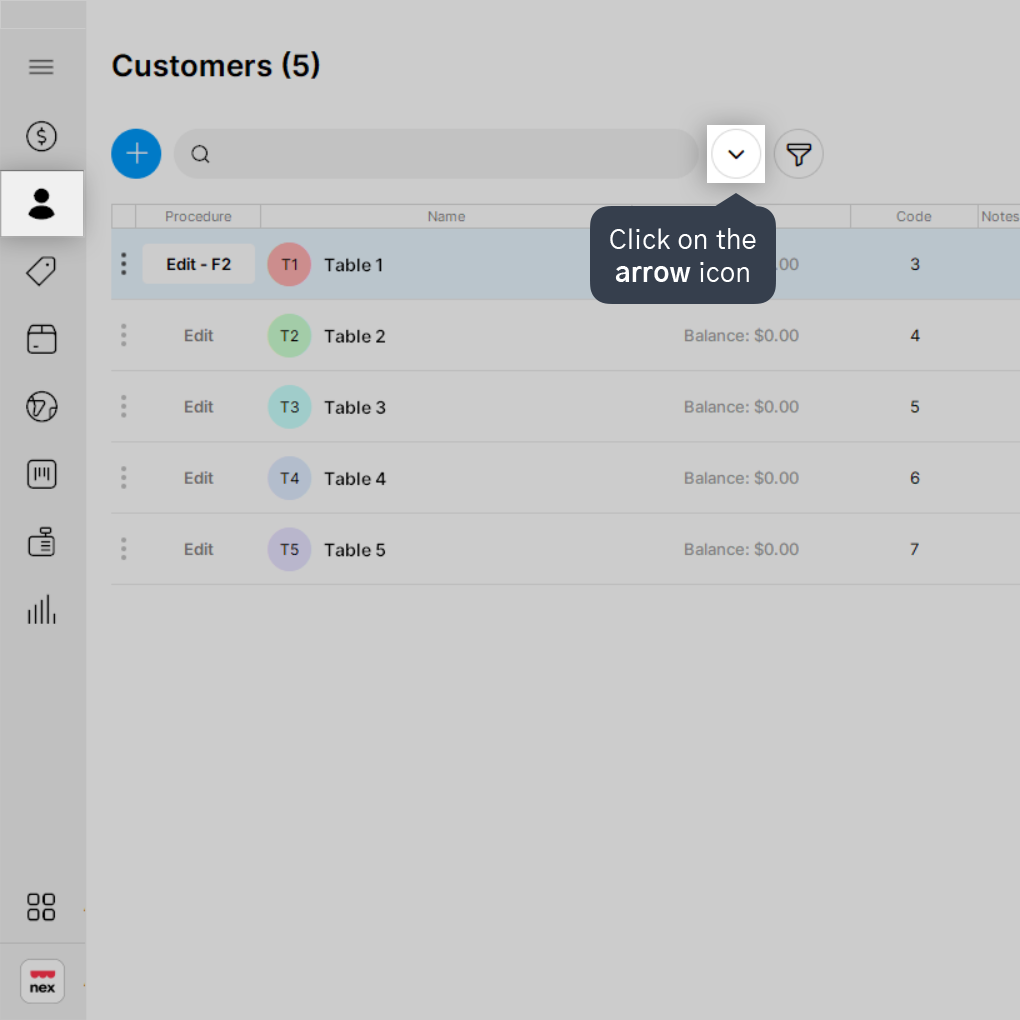
1.3. Still on the Customers screen, click on the arrow icon.
1.4. Click on Layout and then on Add/Remove columns.

1.5. Check only the information necessary for table management in your business.
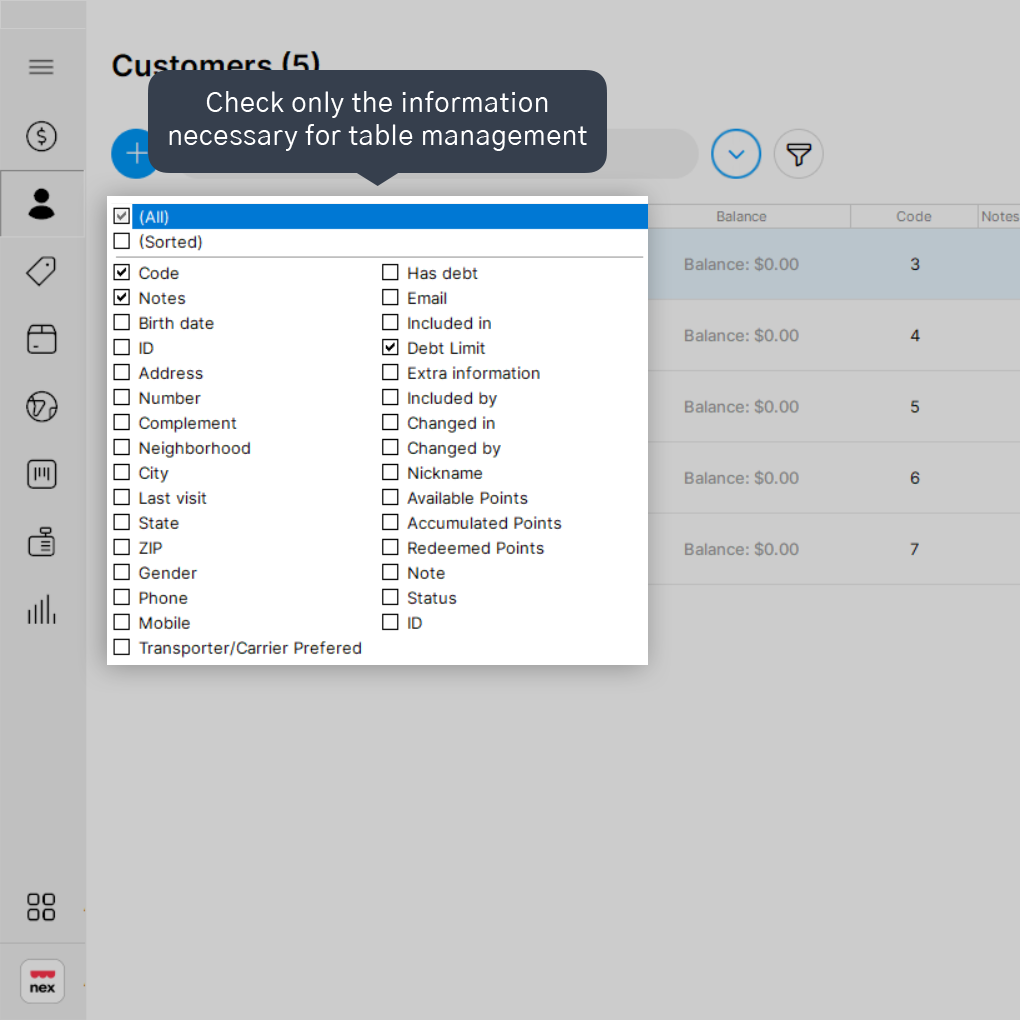
The Procedure, Name, and Balance columns are fixed. In the example above, we checked only the Code, Notes and Debt Limit.
1.6. Click on the arrow icon again, then on Layout, and finally on Save.
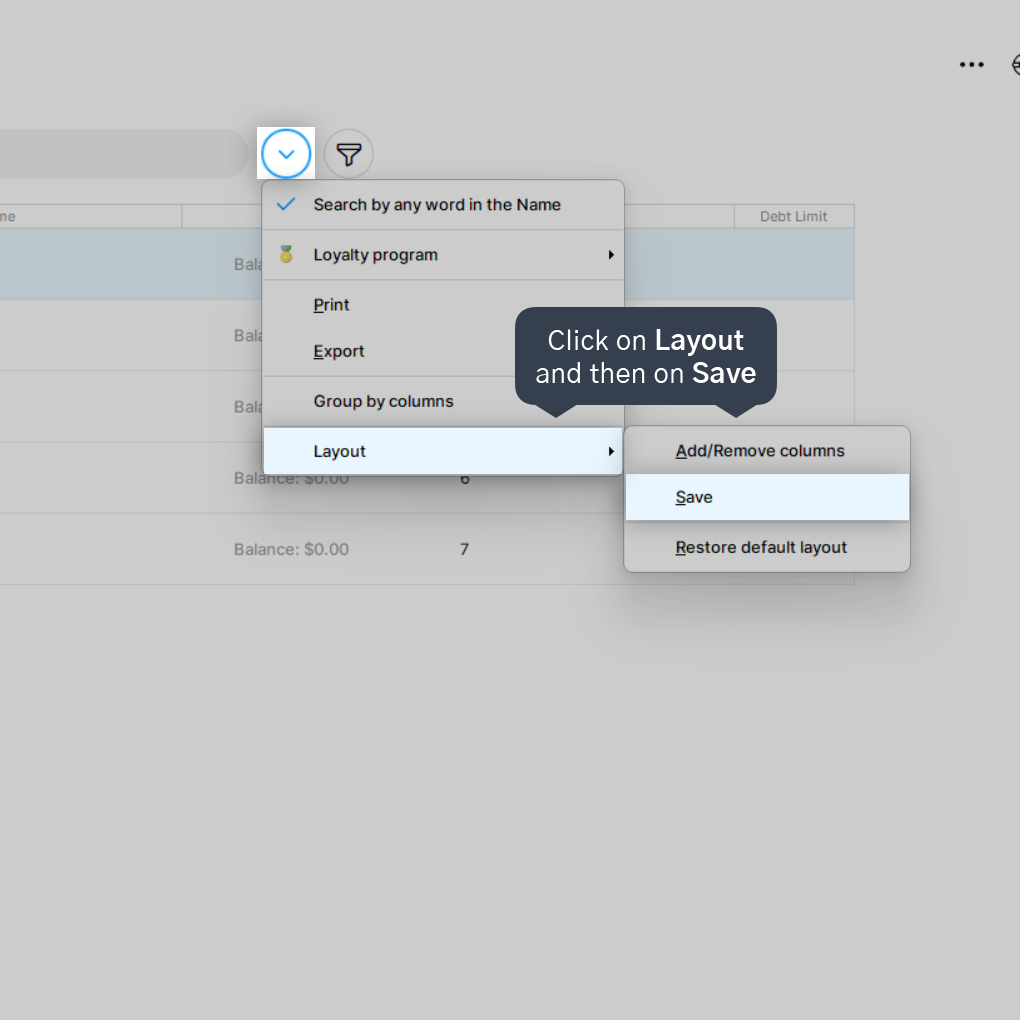
This configuration will keep the previously performed filter saved, even if you close the system.
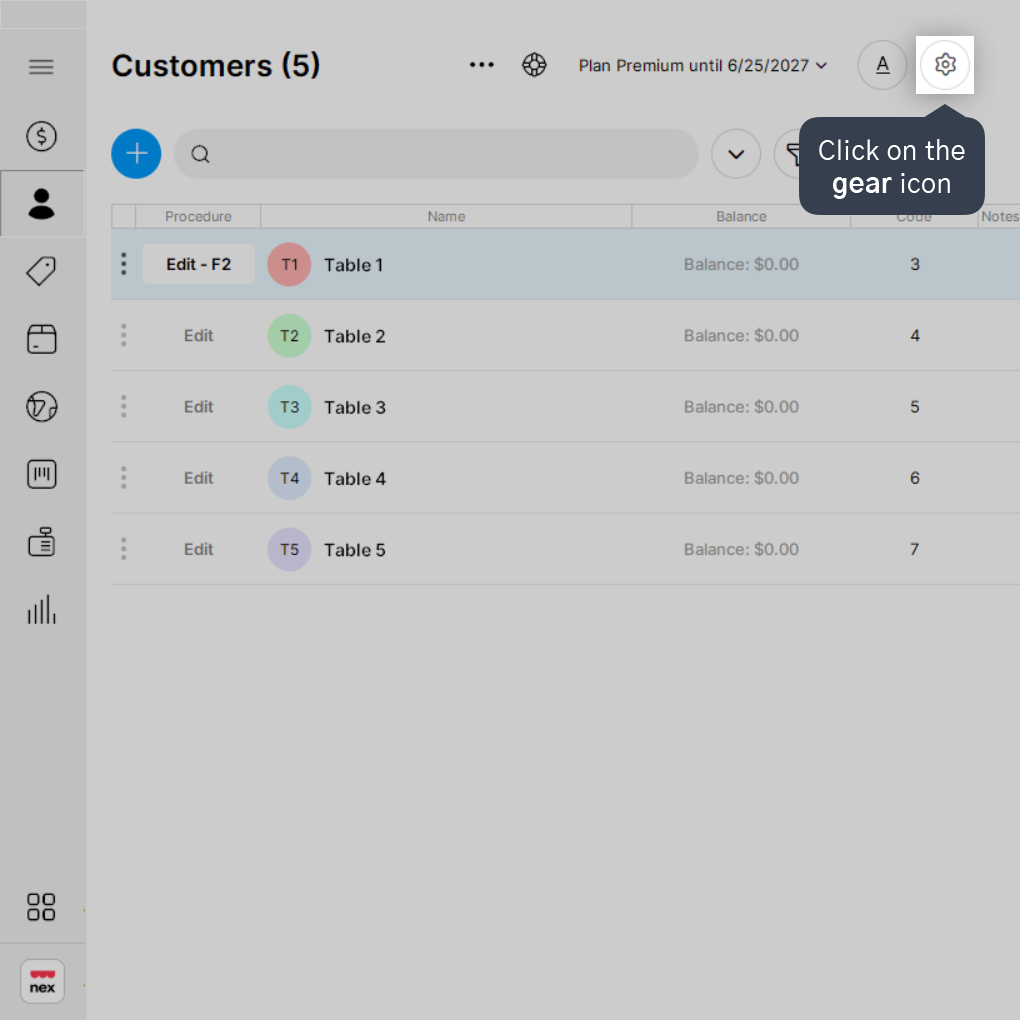
1.7. Still on the Customers screen, click on the gear icon in the upper right corner.
1.8. Configure a maximum amount that the customer can consume in the establishment and then click on Save - F2.
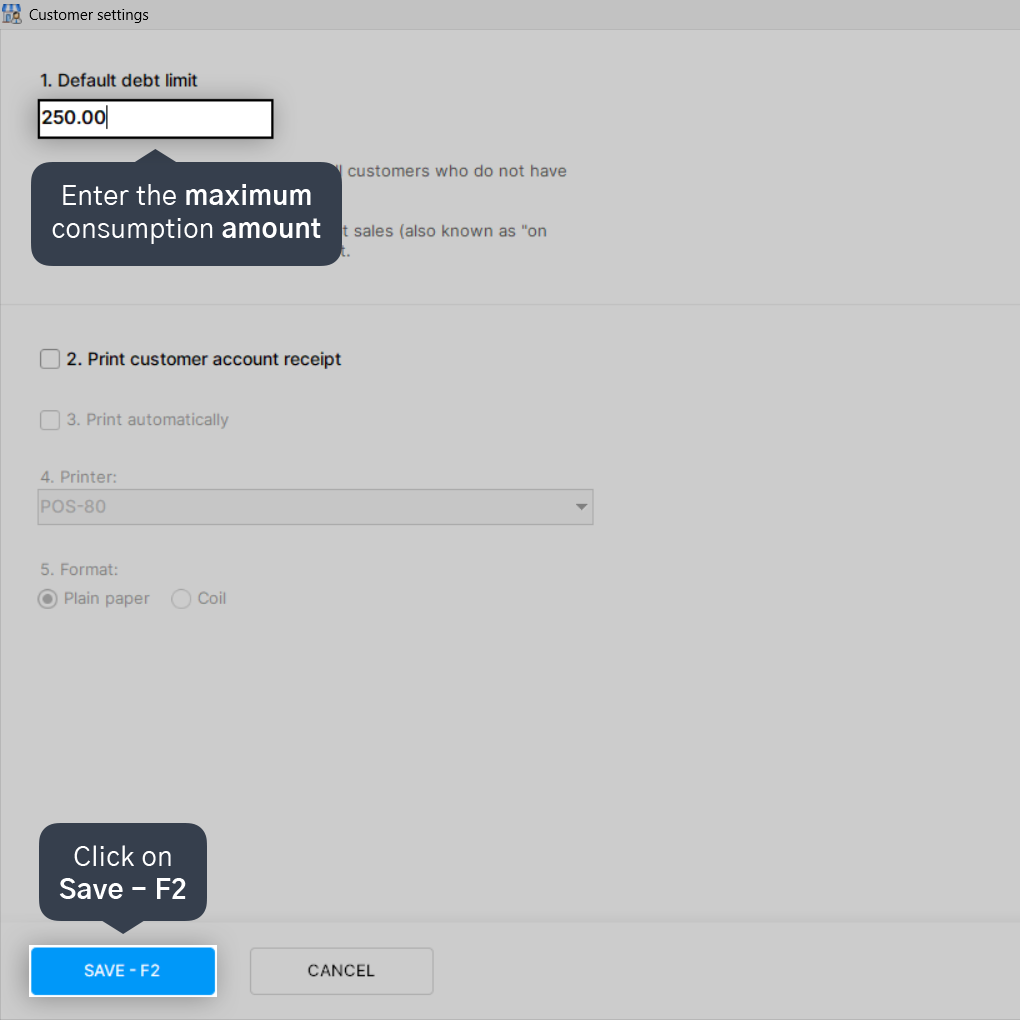
If you do not have a maximum consumption amount, simply enter a very high value so that the limit does not affect the sale.
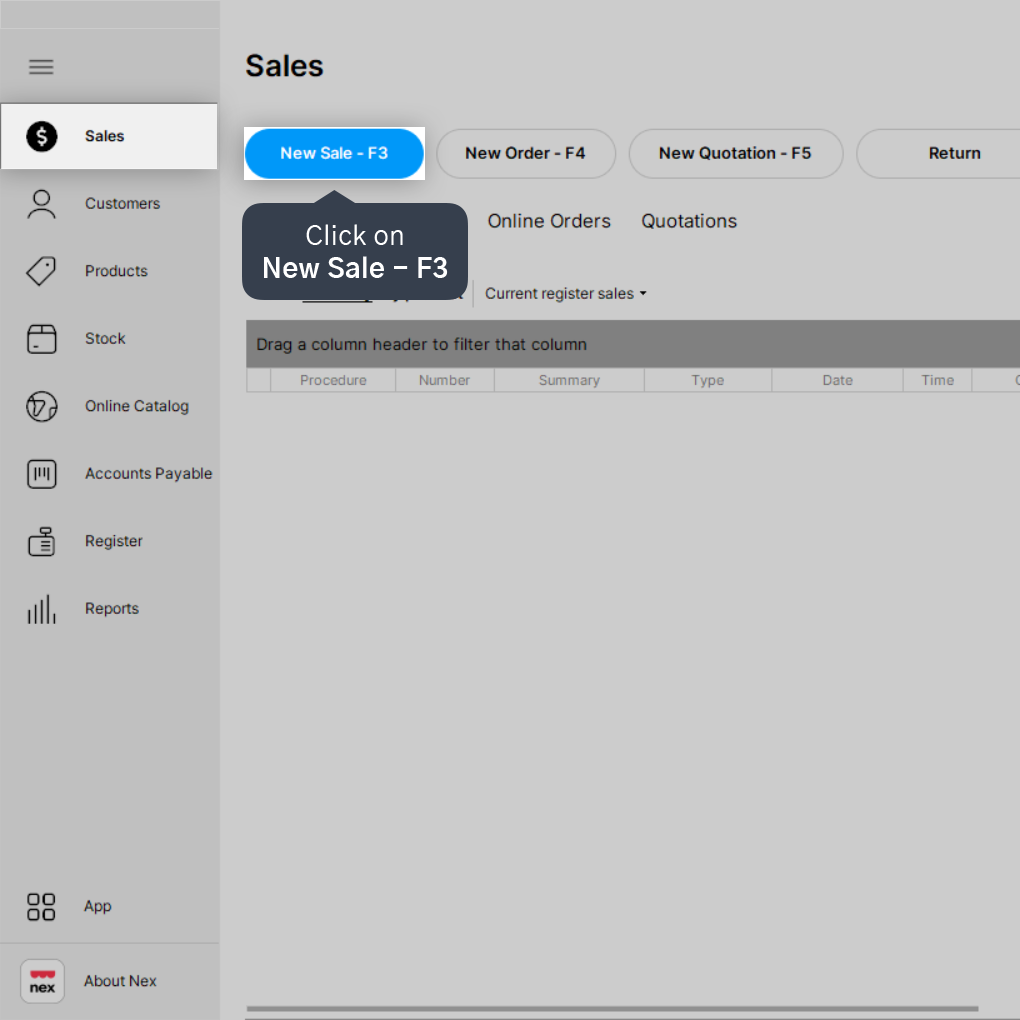
2.1. On the Sales screen, click on New Sale - F3.
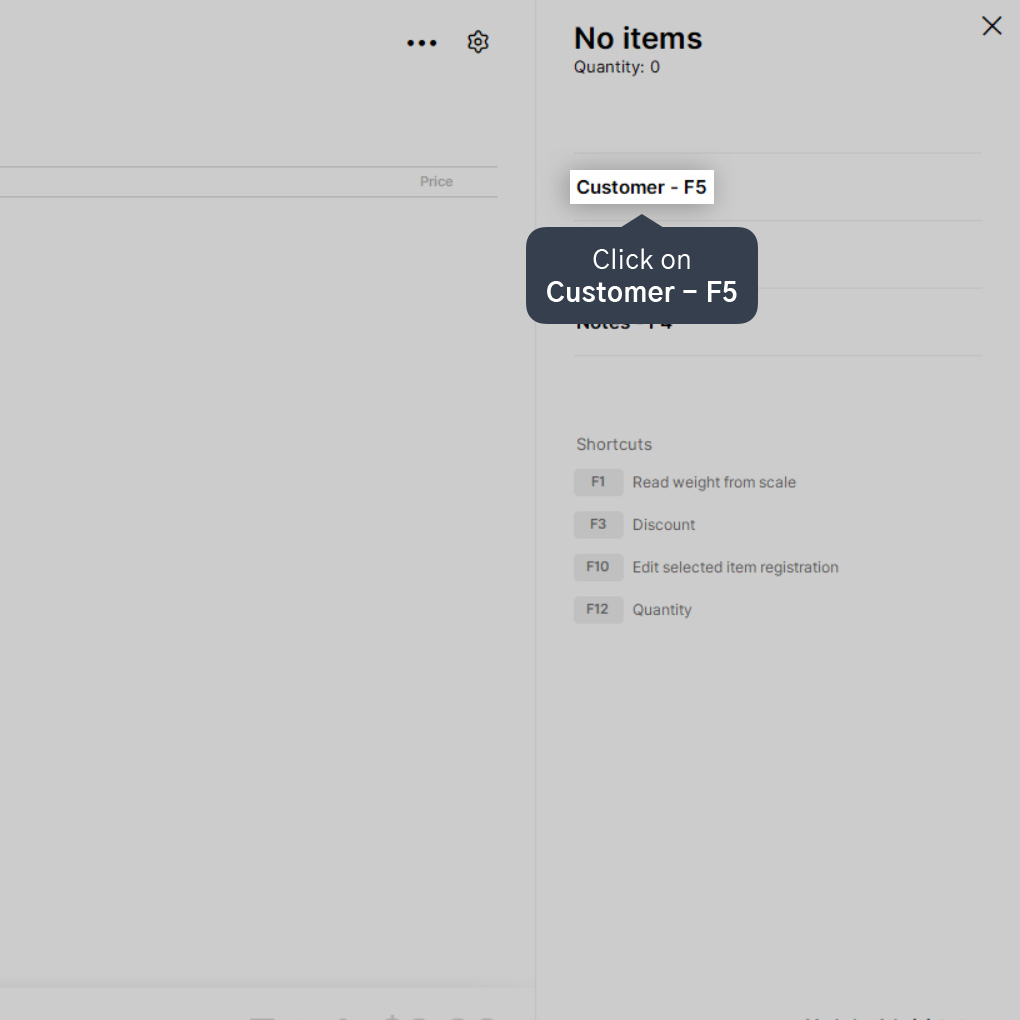
2.2. Click on Customer - F5.
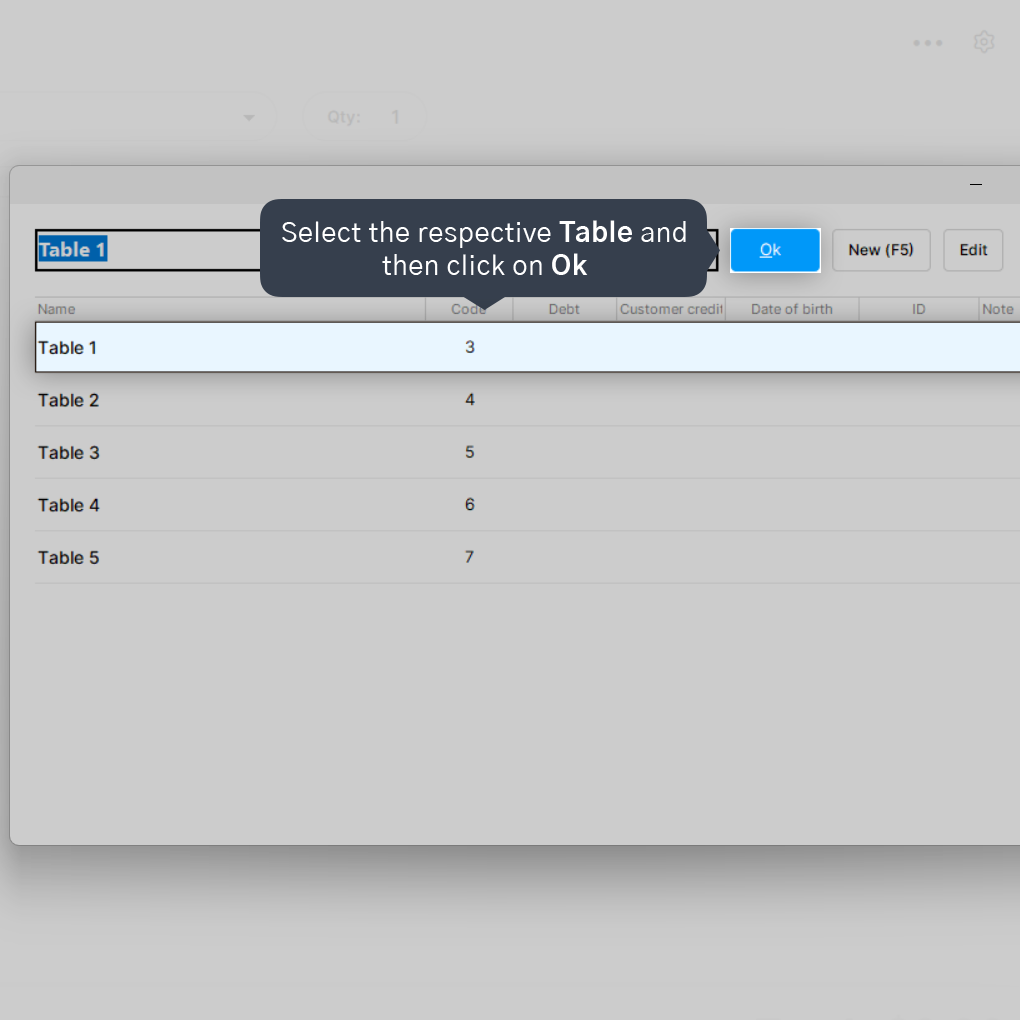
2.3. Select the respective Table and then click on Ok.
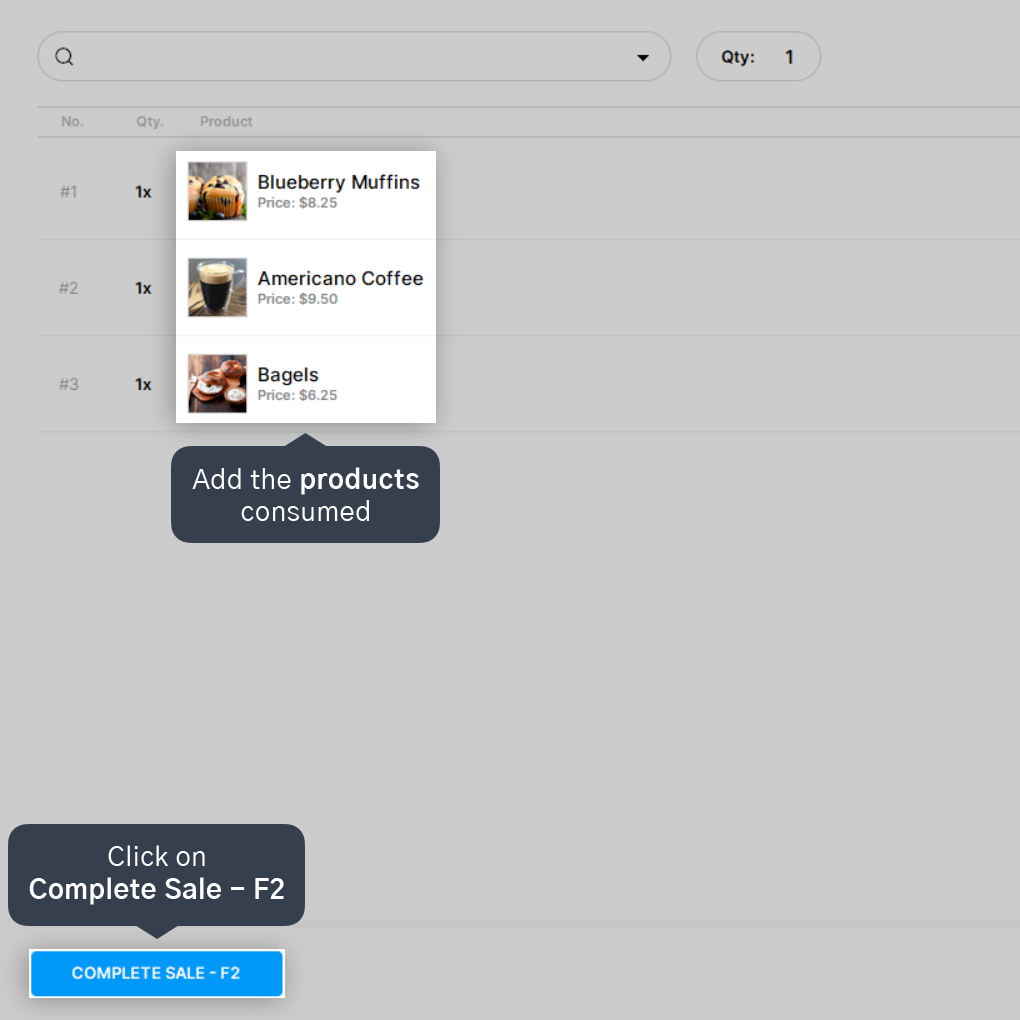
2.4. After you select all products and add the table, click on Complete Sale - F2 in the lower left corner.
2.5. When choosing the payment method, select the Save as debt (F4) option.
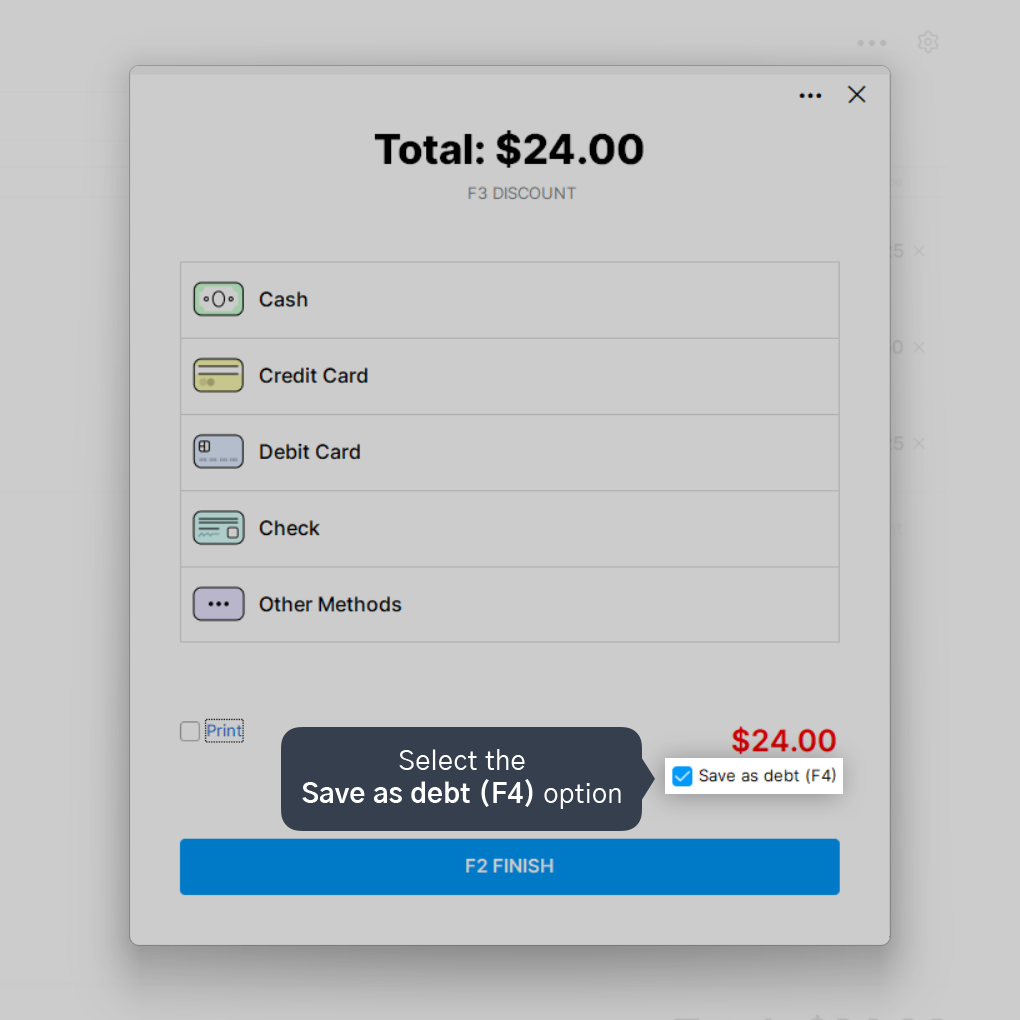
By leaving the sale as a debt, the amount will remain pending for payment in the table's profile.
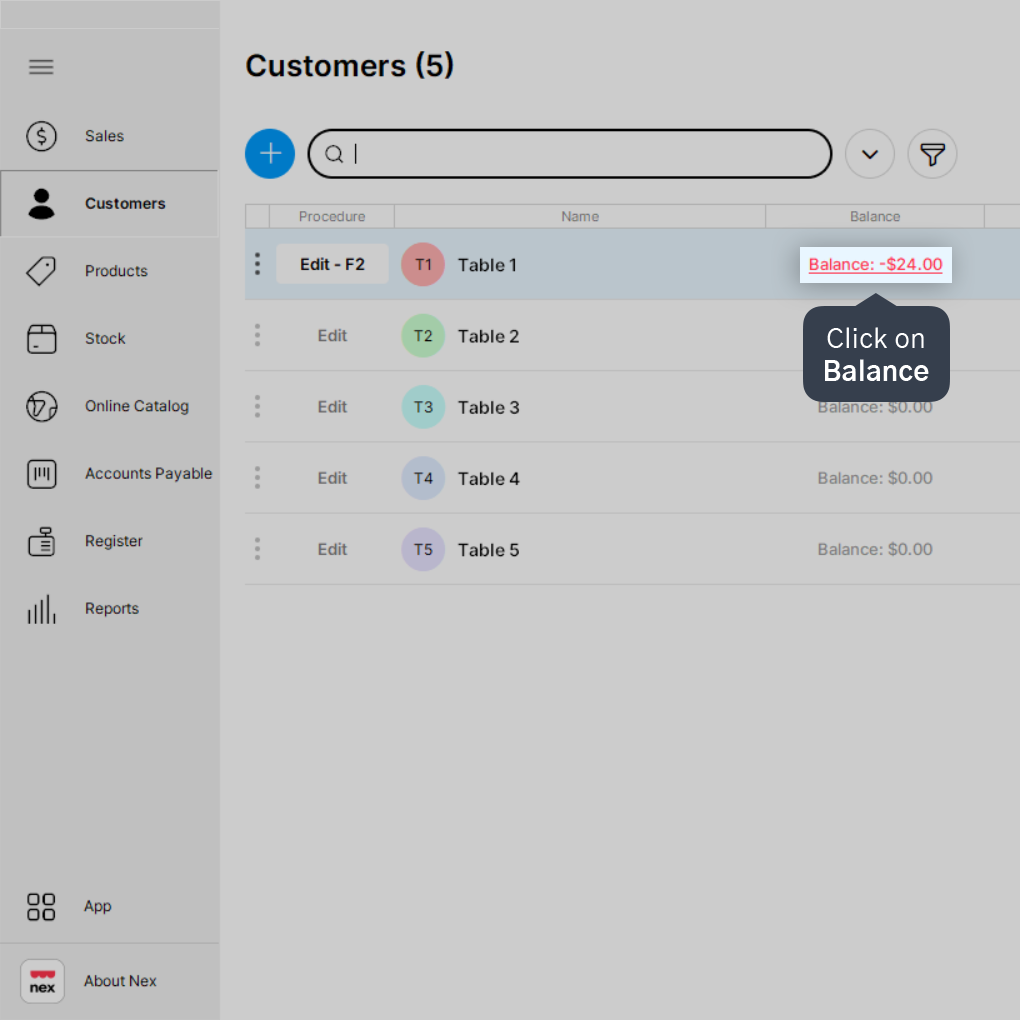
3.1. When it is time to make the payment, access the Customers screen and select the Table that will be paying.

3.2. Click on Balance.
3.3. Select Pay Debt - F2.

3.4. Enter the total that will be paid and then click on Pay - F2.
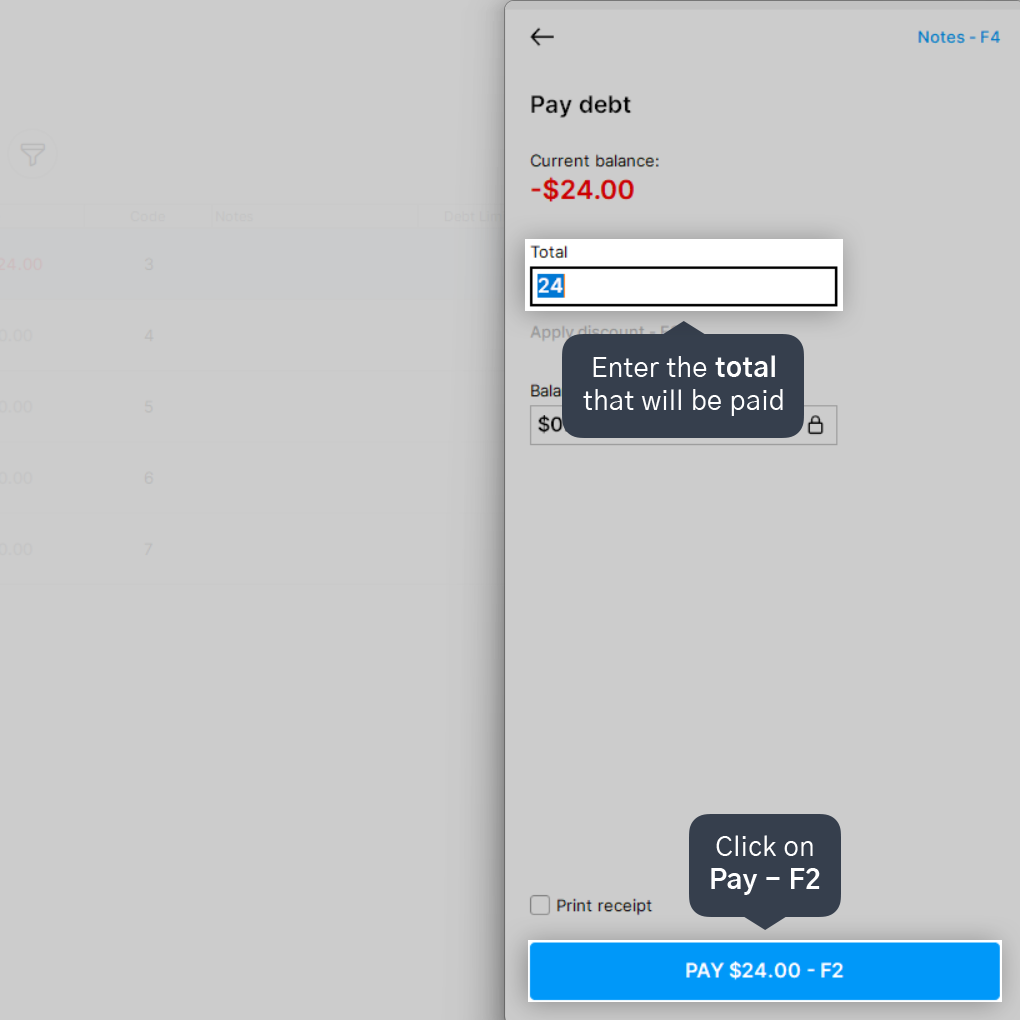
You can make a partial payment if the people at the table are only paying for what they consumed or if a customer at the table leaves early.
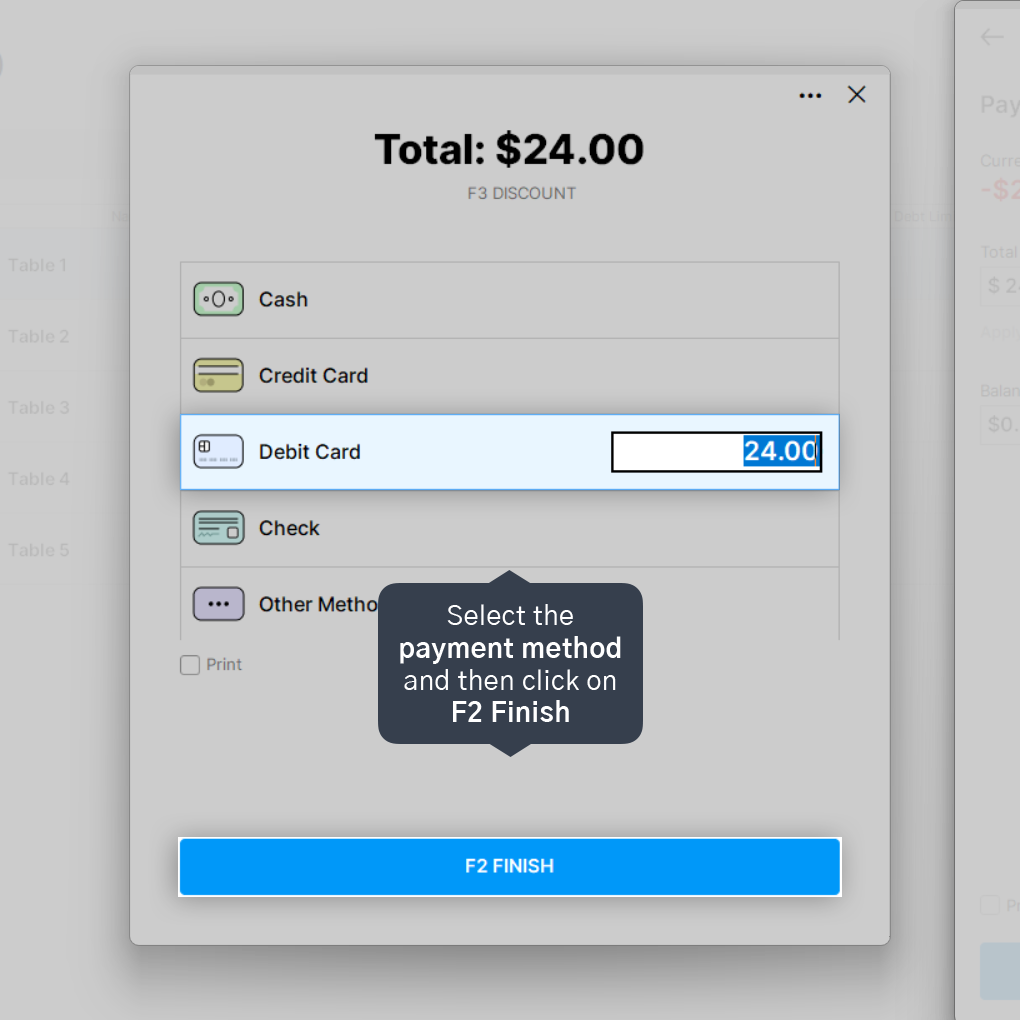
3.5. Select the payment method and then click on F2 Finish to finish.
Done! Now you can manage your tables with Nex.


