Customize Nextar according to local tax regulations and apply the taxes on sales or individual products through Nex on the web, anywhere you are.
1. Access Nex in your browser and log in with your EMAIL and PASSWORD from your Nex account.

2. Click on the PRODUCTS menu.

3. Click the blue ADD (+) BUTTON to add a new product or select a product and click EDIT to edit it.

4. Click on the TAX field to select MANAGE TAX.
.png)
5. Click on the PLUS (+) icon and select CREATE TAX.

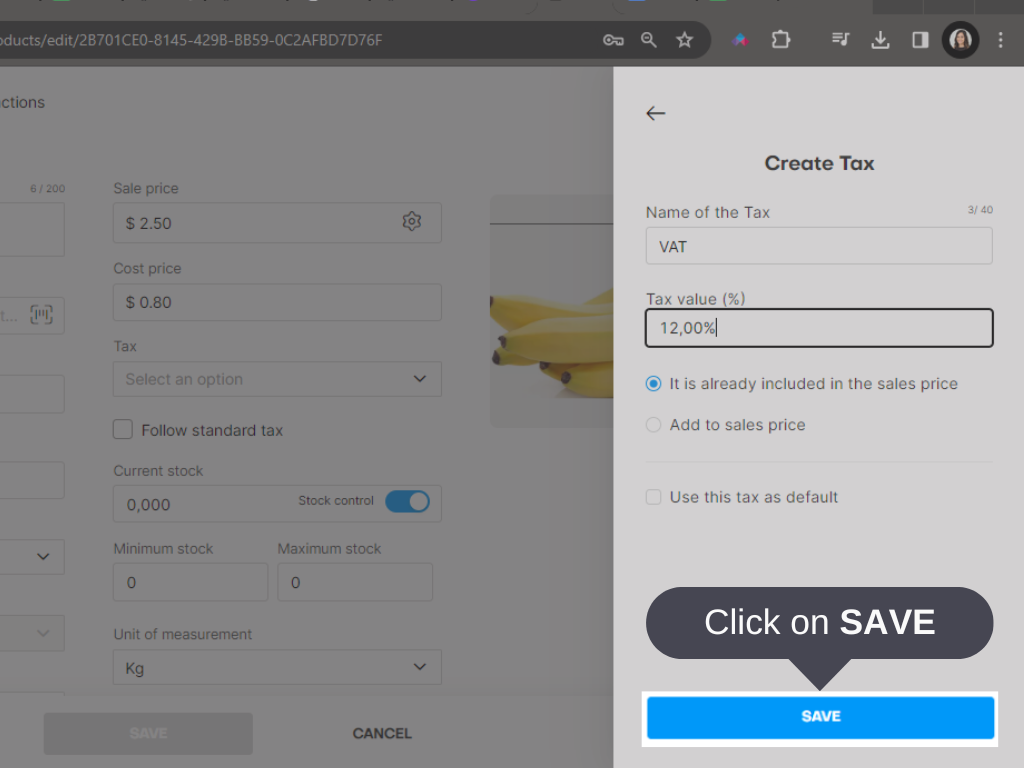
6. Insert the TAX NAME and its PERCENTAGE VALUE.
.png)
7. Choose the TAX configuration, whether IT IS ALREADY INCLUDED IN THE SALES PRICES or it must be ADDED TO THE SALES PRICE.

8. If you prefer, check the option USE THIS TAX AS DEFAULT.

9. Press SAVE - F2.
1. On the TAXES MANAGEMENT screen, click on the PLUS (+) icon and select CREATE TAX GROUP.
.png)
2. Insert the TAX GROUP NAME.
.png)
3. Select each TAX to forme the group tax.
.png)
4. If you prefer, check the option USE THIS TAX AS DEFAULT.

5. Click on SAVE.

6. Once you register the first tax, it is possible to manage them directly from the link on PRODUCTS menu.

Done! You have created a new tax! You can use the same steps to create custom taxes. The tax will be displayed in the sales tab when you select the product.


